Table of Contents
As we discussed in the previous chapter (Chapter 7, wacsunpackmgr - The Unpack Manager), sets can be imported into Wacs in a number of ways and then end up in a holding area for each administrator where they can be viewed, have icons made for them and so on. Once they are ready to be installed into the main Wacs system, another application comes into play called the placement manager. In this chapter we will look at how to use the placement manager to place a set and complete it's importation into the Wacs system. As you will have seen, once the unpack manager has done it's jobs, it provides links to viewing the set and to the placement manager.
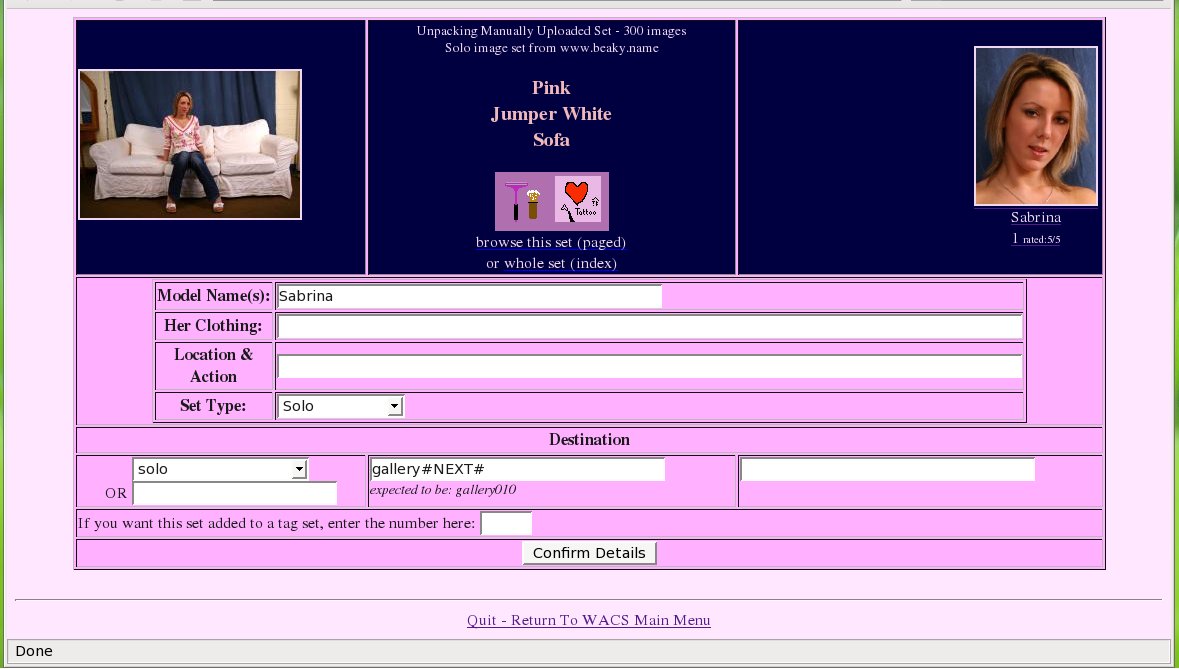 |
When you initially call up the placement manager for a set, you'll see a web page something like this. The top portion of it is a standard page masthead you will have seen in a number of places around the Wacs system. Since in the unpack manager we both identified the primary model and gave the set a working title, these are displayed here as you might expect. The first group of entries are the various components of the set name - the model's or models' name(s), a description of their clothing, a description of the location and action in the set and the general type of set that it is.
As you will hopefully recall from Chapter 4, Naming Sets In WACS, there are a number of special words that will be used in determining extra information on the set. We will cover this topic again in more detail in the section called “Keyword Manager” in Chapter 11, Other Web Based Tools. For now you can just describe the set as best you can and add the mark-up later. As you become familiar with the keywording system you can both tailor it to your needs and get used to what keywords will trigger what markup attributes. While you can use spaces here between works, please do remember to capitalise the first letter of each word of your description.
The lower section of the placement manager form covers where the set is to be placed within the appropriate Wacs media tree and therefore which gallery or models section it will be placed in. Additionally there is the option to add the new set once created to an saved search set (aka tag set). In all cases, the placement manager will try it's best to select reasonable defaults for these values to save you as much typing as possible!
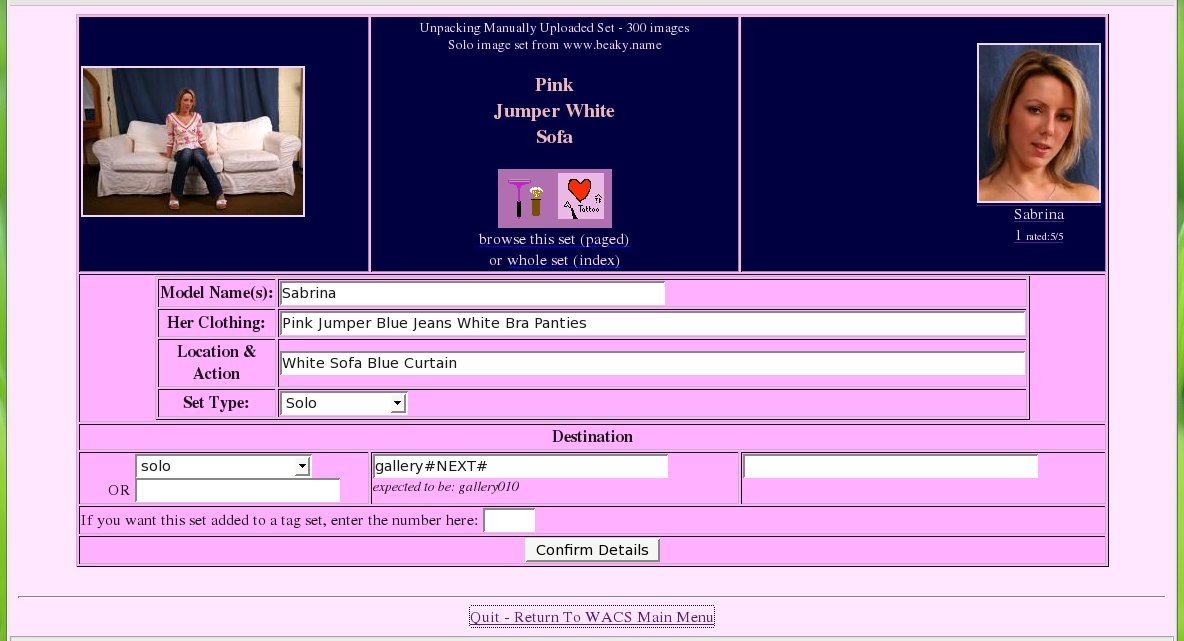 |
In the above screenshot, we've added to the defaulted values by
adding Pink Jumper Blue Jeans White Bra Panties to the
desciption of Sabrina's clothing, and White Sofa Blue Curtain
to the location and action sections. The automatic defaults
of Sabrina for the model's name and Solo
for the set type are fine in this case and thus left unchanged.
Similarly the defaults of solo and the next available
solo gallery slot in gallery010 are also fine in this
case. We've decided to leave the saved search (tag) number blank in this
case, so it won't be added. Once happy, we click on Confirm
Details and we move on to the next screen:
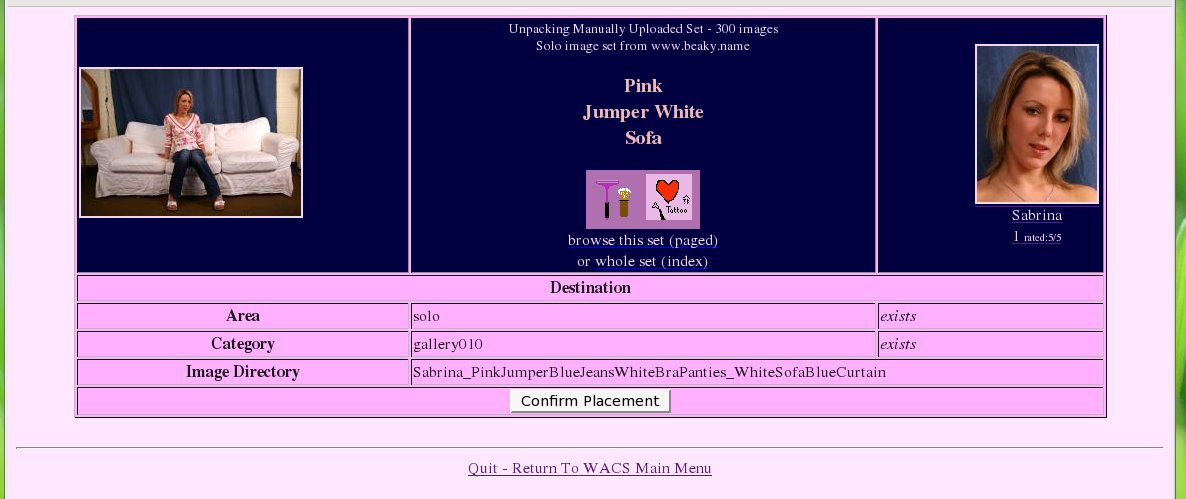 |
This screen summarises the details we've entered and shows us the name it's created using the various pieces of information we've given the placement manager. If you're not happy with any of these values, just click on your browsers back key and re-enter. Remember that if you do this, you will then need to click on Confirm Details to get it to re-assess the new inputs rather than using the web browsers forward button to return here. If everything is in order, click on Confirm Placement.
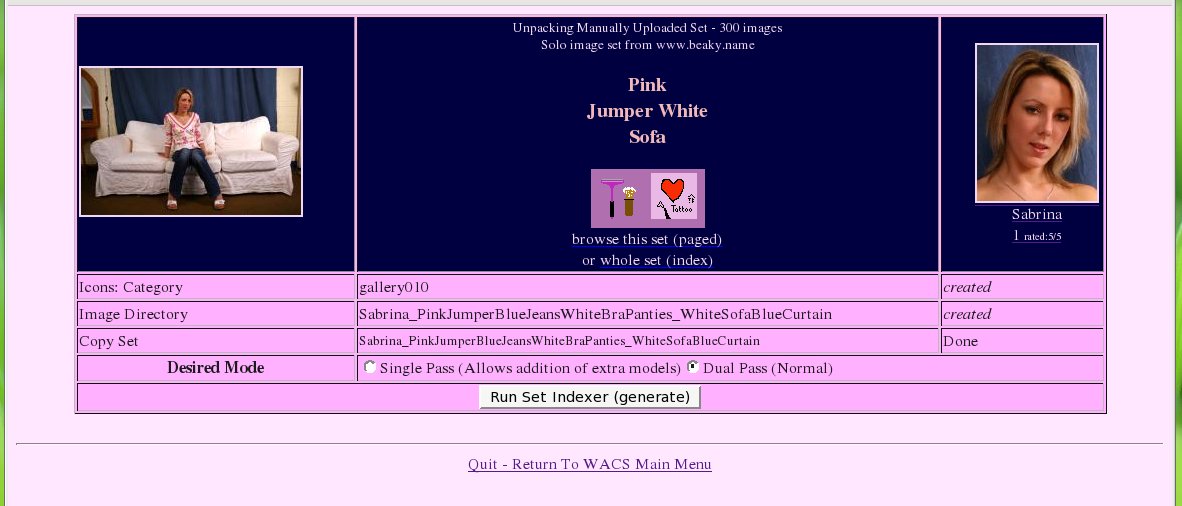 |
At this point the placement manager will attempt to create the new directories and move the files out of your unpack area and into their final destination. If there are problems with file space or permissions, these should be reported here and you'll have various options on how you resolve the problem. In many cases, the simplest approach, if you still have the zip or video file elsewhere is to use the unpack manager to delete the half unpacked set and start again from the beginning. Assuming all goes well with the placement, the files will have been transfered to the Wacs media tree. However, they will not yet be indexed by the Wacs system - that doesn't happen until either the updateinfo or generate commands have been run and so the placement manager gives you the option to run these right away from the web browser. In most cases, you simply choose Dual Pass (normal). The other option is used for Lesbian and Group Orgy sets where you can identify another model featured within the sets. As we don't currently have any lesbian sets we have the rights to show, it's kinda hard to illustrate that at the moment. We hope to resolve this shortly...
Clicking on Run Set Indexer (generate) will invoke the command line based updateinfo and generate programs which will create the new set in the database and run the various keyword search schemes to determine as much of the set description attributes (metadata) as it can from the descriptive text you gave.
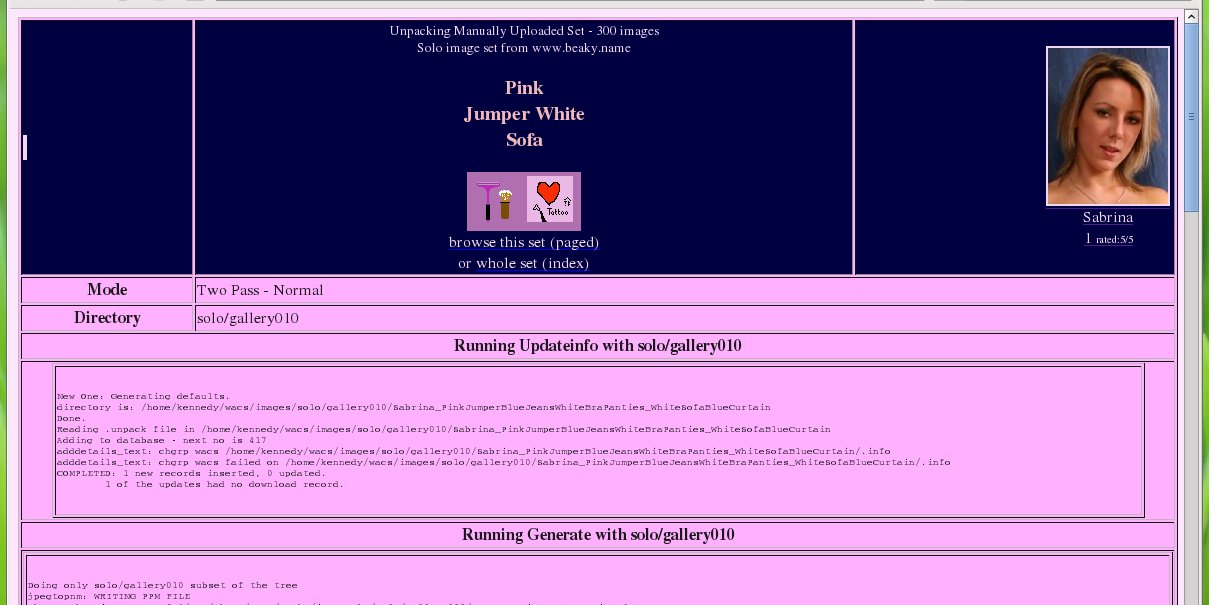 |
When you run the set indexers, they will also consider any other sets in the same gallery while they're creating the new set. This ensures that the gallery is freshly preened before people are attracted to it by your newly added set!
 |
Once updateinfo and generate have completed their work, you'll be presented with a number of options for the next action. You can rate the set, view it or see it's info page or go back to the model's page. We'd recommand rating it at this point, and clicking on the Rate It Now link will take you to the Chapter 9, Wacs Set Manager....