Table of Contents
One of the really major aspects of Wacs is it's ability to access sets via a range of methods, one of the most important of which is to be able to look at the work of a specific model. When we're adding new sets, we want to be able to add that set to a model's portfolio and in order to do this, the model has to already exist within the Wacs system. This chapter will look at the model manager application, outline how we create a model for the first time and show you how to update a model record. If you want to look at an example model record for reference, there are currently two model pages provided as XML files within the samples directory of the Wacs distribution. These can be imported into the Wacs system using either the model manager itself or using the command line tool wacsimport which is described in Chapter 12, Migration Tools.
With a suitable account running in administrator mode, the model manager is the top link (and also the default) on the rightmost menu, Maintenance, on the Wacs front page. Note that if you're not offered this menu, but instead see the Preferences menu, your account is not currently running in administrator role. Please go back to Chapter 2, First Steps for details on roles and how to change them.
 |
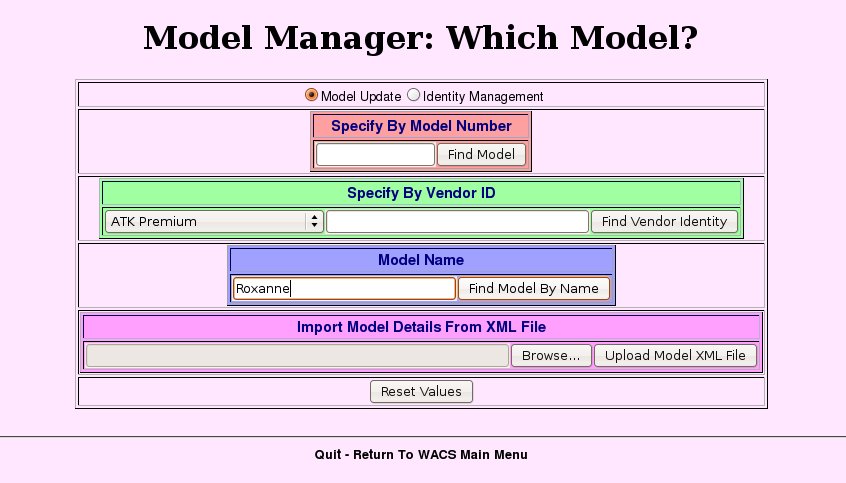
As you can see, this screen offers quite a few different ways to
locate the model you're looking for. The first of these is by simply
specifying an existing model already defined on this Wacs installation
by model number and then hitting the Find Model button.
The second allows you to select by a model's identity
on a known site - if you remember from the last chapter
(the section called “Determining The Site Id”) that Sabrina has a key (aka reference
number) of 422 on Sapphic Erotica. You would pull down the list of sites,
select Sapphic Erotica, type in 422
and then click on the Find Vendor Identity button.
The third option does a name based search and then offers a list of matching
models (if any) and is what we're about to use in the next few examples.
The fourth option is use in conjunction with the migration tools and
will be descibed in a later chapter (Chapter 12, Migration Tools).
Before we look at how to actually create a model, we're going to just quickly examine an existing record - in this case Roxanne's - so you are familiar with the overall layout of the model manager. We start off by entering the name of the model we wish to examine in the box labelled Model Name, and then click on the button Find Model By Name. When you click on this button, The Wacs Model Manager will attempt to show you the headshots and descriptions of every model known by that name on the current Wacs site. This includes aliases and non-standard names specific to only one site.
![[Note]](images/note.png) | Note |
|---|---|
With this particular name, Roxanne, it would have probably been more sensible to have searched for the shorter alternative spelling of Roxan to just cover the possibility that she is known to this Wacs site but under the shorter version of the name or as Roxanna. We do get the chance to edit the name later. |
 |
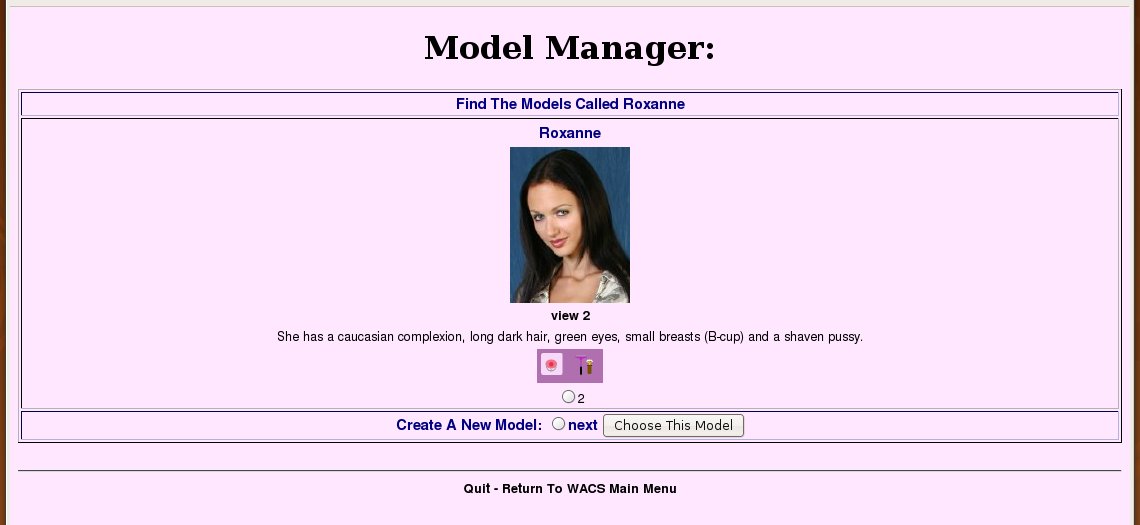
In this example we've been given two options - one is to choose existing model number 2 (Roxanne) or next - for now we're going to select our existing model number 2. If we wanted to create a new model, also called Roxanne, we would simply select next which allows us to create a new model. If there had been other models with this name, we would have been shown each of their headshots and basic details as well as the option to create a new model.
![[Tip]](images/tip.png) | Tip |
|---|---|
The tick box you need to select is just below the attribute icons - with just a single digit next to it, it may be a little difficult to spot on first viewing. The view 2 link just below her headshot allows you to view her model page to confirm any details you wish to confirm before selecting her. After visiting it, you can merely push the back button on your web browser to return to this screen. |
It's important to understand that it's at this point that we're deciding between updating an existing model and creating a new one. The point here is that before we create a model we want to have confirmed that there is not an existing entry for this model. If we select one of the existing models, Wacs allows us to edit the model record for that model. If we select next, we start on the process of creating a new model record.
 |
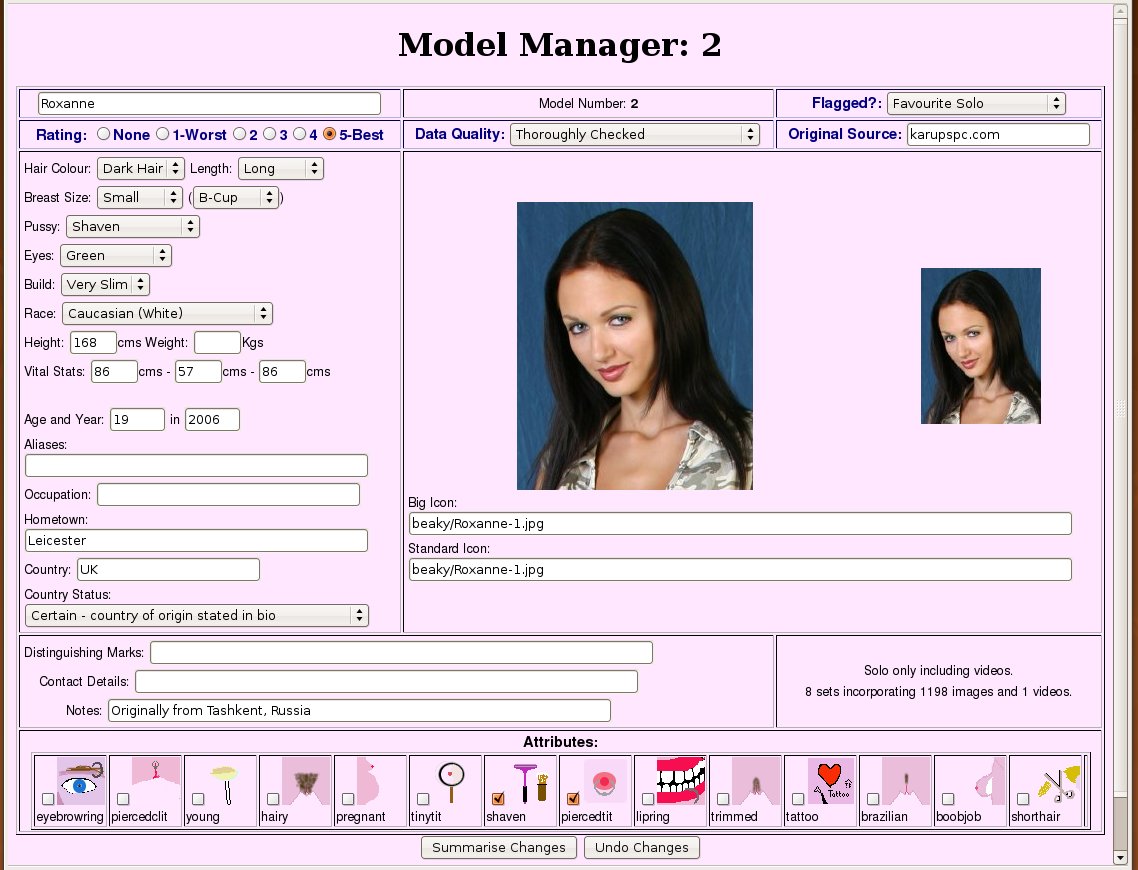
This screen contains most of the data that we store for any given model, grouped in hopefully reasonably logical fashion. Along the top we have the basic data; name, rating, source, any special flagging and the data quality indication. On the left we have all of the descriptive data, while to the right we have the two headshot icons and the respective paths to those files. Moving down the page we have descriptive information about the model, and at the bottom a row of icons that can be applied and tick boxes to make those marks. At the very bottom we have the web form buttons and quit link.
Now you have a basic idea of how the model manager works, we're going to move on to how to actually do various tasks using it. The first one being to create a new model record.